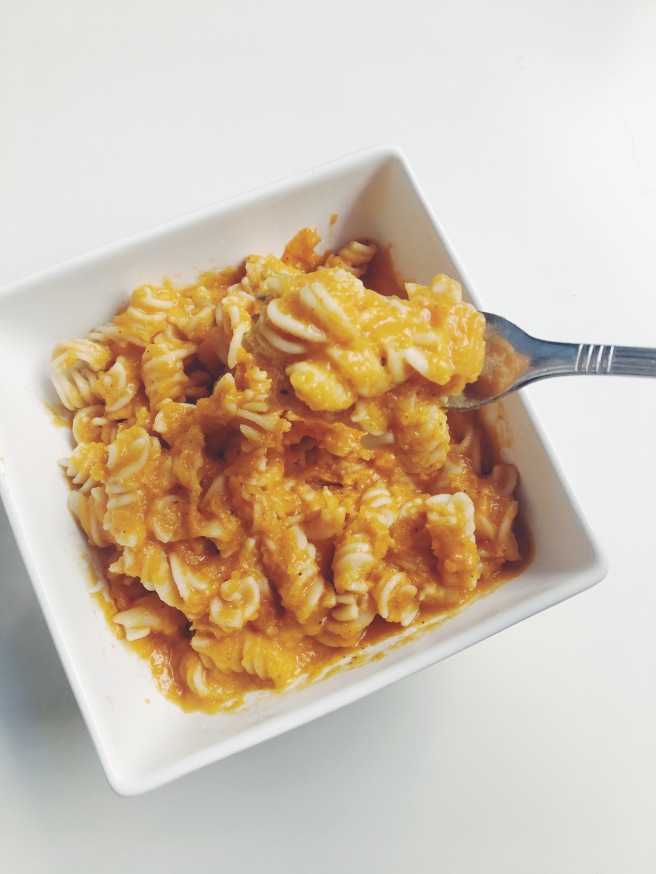
Butternut Squash Mac N’ Cheese

Processed with VSCO with f2 preset

My sister had purchased one too many butternut squashes and had given me one over the weekend. At first I didn’t know what to do with it other than to season it and bake it in the oven. I almost always prepare butternut squash that way but this time I wanted to do something different.

It was piercing cold today…the type of cold you don’t think twice about stepping outside without a winter coat. For a California native, mid 50 degrees F is really cold to me HAHA. I’m sorry if you live in a really cold environment and wouldn’t think 50 degrees F is cold. I know, I should just shut up. But anyway, back to my point about why I wanted to make this warm, comforting meal. The weather inspired me to make some comfort food and what better way to satisfy those cravings than to make mac n’ cheese and bundle up on the couch in a super warm blanket watching The Bachelor! I decided to make a healthier alternative to the traditional mac n’ cheese by adding the wonderful winter squash people usually use to decorate their mantels with. It’s a great way to add in your veggies and if you have little kiddos, it’s a perfect way to incorporate fiber, vitamin C and potassium! Read ahead for the step-by-step recipe.

INGREDIENTS

  • 1 medium butternut squash, de-seeded and peeled
  • 6-8 cloves garlic, minced
  • 2 tsp black pepper
  • 1 tsp cracked salt
  • 2 tsp paprika
  • 2 cups almond milk
  • 1/2-1 cup Swiss cheese or Parmesan (I wish I had nutritional yeast for this recipe but unfortunately did not. So for you vegans, this would make a great alternative to cheese. I’m not sure of the measurements though. Try it out and let me know!)
  • 16 oz. Gluten free pasta (I used brown rice rotini from Trader Joes but use your favorite kind!)

INSTRUCTIONS

  1. Rinse and cut butternut squash in half. Scrape the seeds out. Peel and cut into large cubes
  2. Bring a pot of water to a boil. Add cubed squash and cook until fork tender
  3. Drain liquid and transfer squash and 2 cups almond milk to a blender and pulse until smooth. Pour back into pot on low heat
  4. Cook gluten free pasta according to instructions on package (I prefer al dente). Rinse and drain
  5. Add remaining ingredients and cooked pasta to the squash mixture. Fold and mix well. Sprinkle with parsley for garnish and additional shredded cheese if desired. ENJOY!

Sassy Me,

Michelle

All About that No Wheat Life

Processed with VSCO with f2 preset

The day I was diagnosed with a wheat allergy, I was in disbelief. I didn’t want to make any dietary changes because I just loved bread too much. And if you know me, I am such a foodie. It would be too hard to tip-toe around this  grain that is seriously used in everything! I didn’t want to go through the trouble of researching restaurants ahead of time nor did I want to read food labels. To be honest, I was just plain lazy. Not only is it found in breads but it’s used in salad dressings, sauces (soy and teriyaki), cakes, pastas, flavorings and food starches! (There’s actually a really long list of ingredients that contain wheat so I’ll provide a link at the bottom of this post in case you’re curious). So for 4 years after my diagnosis, I continued on with my life and decided not to do anything about it. It wasn’t until just a few months ago that I decided to cut wheat out of my diet. Wow…my sinuses are clearing up. What? I can actually breathe now? What is going on?? So, you’re probably wondering why I didn’t cut it out sooner. Well, at the time I got my results back from the doctors, they mentioned the wheat allergy but didn’t really go into detail. Wheat was one of many other things I was allergic to. Cat dander, dog dander, pollen and dust mites scored the highest. But wheat, not too high. So I figured, if the doctor didn’t really think much of it, maybe I shouldn’t either. Not to blame my DOC because I truly believe that I should have looked into my wheat allergy more for myself, but nope. Not today junior! I just didn’t care. It was something I just dealt with because I figured my sinus problems were caused by my environment and not so much from what I was eating. It was only until recently when I got so fed up over my (left) nostril being clogged up, I just had to do something about it.  Fast forward to a few months ago when I researched wheat allergies and sinus problems. Ah HAH! DUH. I went back to see another doctor to confirm that the  allergy test taken 4 years ago was accurate. She confirmed that I indeed was allergic to wheat. So here I am, writing to you beautiful people, breathing clearly out of BOTH nostrils. It seems like such a little thing but MAN! I am loving life even more now. I can breathe better when I sleep, I can breathe better when I run, I can breathe better sitting in a quiet room among other people and am not the elephant in the room for being a mouth breather…the list goes on.

I am sharing my story with you because some of you are probably going through what I went through. If you’re having problems but have put it on the back burner, I’d suggest you take an allergy test or do a food challenge because the quality of your life will improve immensely!

Now don’t get my wheat allergy mixed up with Celiac disease.It is not the same. A wheat allergy is an immediate immune response to wheat protein. Those who have Celiac disease have a hard time digesting gluten, a protein found in wheat, barley, rye and some oats that have not been certified gluten free due to cross-contamination. When a person with Celiac disease eats gluten, the small intestine is damaged causing them to have difficulty absorbing nutrients from food.

You have read up to this point and I am so grateful for your attentiveness. SO! What do I eat then you ask. I usually eat the following wheat alternatives:

  • rice flour
  • oats (certified wheat free)
  • potato starch
  • tapioca flour
  • corn flour
  • nut flour (I like to grind up almonds)
  • bean flour
  • sorghum flour
  • gluten free products (choose wheat free)
  • quinoa
  • coconut flour
  • and more fruit and vegetable flours

Living that wheat free life is something I had to change for a better quality of life. And to be honest, it was only a challenge for about a week. Once I got the hang of pin pointing wheat on food labels and making sure that the food contained zero wheat, I was able to get even more creative in the kitchen. I tried making my own almond flour bread (even though it was more of a dense loaf–going to perfect it soon), made a wheat free apple crisp (delish!–check the previous post) and have even opted out on grains during meals to make it low-carb. There are so many wheat alternatives these days, it makes having a wheat allergy not really a big deal (for me at least). So chin up young lad! Get creative in your kitchen or dine at restaurants that have wheat free options (there are so many out there now) because having a wheat allergy doesn’t mean you’re limited, it means you are free to be creative by thinking outside of the box! Because now you know there’s an ample list of wheat alternatives out there that are tasty and may even be healthier, too!

Sassy Me,

Michelle

P.S. Click this link to  read up on food ingredients that contain wheat. Be sure to avoid these when you’re reading food labels or ask your waiter when you’re eating out. http://www.kidswithfoodallergies.org/media/Wheat-Allergy-Avoidance-List-Hidden-Names.pdf

P.S.S. Try choosing certified USDA organic foods when possible. This is another topic that can be super lengthy that I will NOT delve into now.
Apple Crisp 


Hi Friends!

Thanks for visiting my site. I know it’s been awhile since my last post but life happens and starting a new full time job can drain ya. At the end of the day, you just don’t want to do anything! But I’ve gotten the hang of things now and am getting used to my work schedule so I’m BACK! Trying to post more recipes and share more of what’s been going on in my life. If this is your first time visiting my blog, you may want to know that I like to post healthy recipes that actually taste good and sometimes I like to share recipes that cater to my diet. If you read my bio in the About Me section, I am trying my best to follow a low FODMAP diet as I have IBS. Yes, very straight forward and a little “TMI” for some of you but that’s me. You’ll get to know that I’m a little sassy but am trying my best to inspire wholesome eating for a healthier you. From time to time, I like to add some interesting nutrition facts down at the bottom of each post (won’t be doing that for this one).

Now let’s cut to the chase and get you started on this wonderful apple crisp I found on Cookie and Kate’s food blog. I modified the recipe a bit since I didn’t have some of the ingredients at home. Feel free to do so too. Recipes are just guidelines anyway, right? No need to follow step-by-step. 😉

This is the perfect dessert to take to holiday parties or a sweet treat for a regular night in. Be sure to top it off with some vanilla bean ice cream! 

Prep time: 15 mins Cook time: 50 mins Total time: 1 hour 5 mins

Serves: 6 servings (double the recipe for more, obvi 😉) 

INGREDIENTS

Apple filling

  • 4 medium honey crisp, granny smith or gala apples sliced into 1″ chunks (I like the skin on for more fiber but feel free to peel the skin off) 
  • ⅓ cup honey 
  • 3 tablespoons cornstarch (for a gooier crisp, use half of the amount) 
  • 1 teaspoon ground cinnamon

Oat and almond flour topping

  • 1 cup old-fashioned oats (use certified gluten free oats if you follow a GF diet)
  • ½ cup firmly packed almond flour
  • ⅓ cup lightly packed brown sugar
  • ¼ teaspoon salt 
  • 4 tablespoons butter, melted (or 4 tablespoons coconut oil, melted. I haven’t tried it this way yet) 
  • 3 tablespoons plain yogurt (Greek or regular)

INSTRUCTIONS

1. Preheat the oven to 350 degrees Fahrenheit. In a 9 by 9-inch square baking dish or 9-inch round baking pan, mix together the apples, honey, cornstarch and cinnamon.

2. In a medium mixing bowl, stir together the oats, almond flour, brown sugar and salt. Mix in the Greek yogurt and melted butter. Stir until all of the flour is incorporated and the mixture is moistened throughout. If using coconut oil, you may need to add 2-3 more tablespoons until the oat mixture is fully moistened. 

3. Add spoonfuls of the oat mixture over the filling until it is evenly distributed (no need to pack it down). Bake for about 45 to 50 minutes, or until the filling is bubbling around the edges and the top is nice and golden. Let the crisp rest for 5 to 10 minutes before serving. Serve with vanilla bean ice cream or a dairy free ice cream of your choice if you’re lactose intolerant. 

That is it! Prep time was super fast. I actually made it while watching a movie and doing a little DIY craft. I just popped it in the oven and didn’t worry about it until the timer went off. Perfect for those who like to multi task while cooking (in this case baking). Hope you like it! And a big thanks again to Cookie and Kate’s blog for yet another tasty recipe. 

Sassy me,

Michelle 

P.S. If you want nuts, add 1/2 cup of your favorite nut. Walnuts, pecans or sliced almonds would be good. 

P.S.S. Use certified organic if possible. 

Flourless Black Bean Brownie (Cake) 


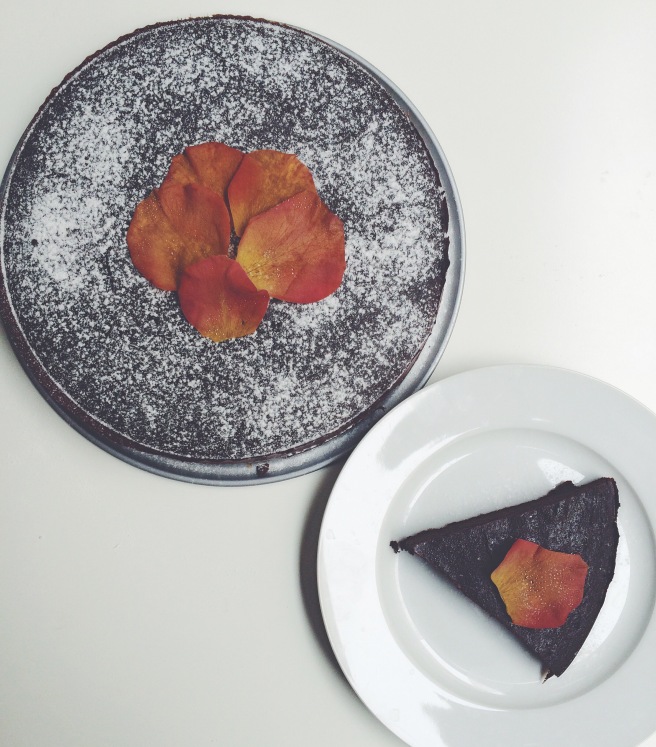
I was craving some chocolate one night this week and decided to make a sweet treat for myself. I’ve been wanting to make black bean brownies for awhile now but finally came around to doing so. This recipe is super easy and you probably already have all of the ingredients at home. It takes about 10 minutes to prep and 25 minutes to bake. It’s gluten free and has a super food in it (black beans 😉) so don’t feel so bad while eating it. Well, you shouldn’t feel bad whenever you eat anything anyway. I adopted this recipe from Fitmencook.com but left out a few ingredients to satisfy my taste. It’s super fluffy and moist. It sort of reminds me of a soufflé. I bet it would taste wonderful with some coconut or vanilla bean ice cream. Feel free to add walnuts or chocolate chunks for a nice crunch!

INGREDIENTS 

  • 1-15 oz. can organic black beans (drained)
  • 1/2 cup cocoa powder, unsweetened
  • 3 eggs
  • 1/3 cup honey
  • 1/2 tsp baking soda
  • 1/2 tsp baking powder
  • 1 tsp cinnamon
  • 1 Tbsp coconut oil
  • 1 Tbsp vanilla extract
  • 1 Tbsp almond milk (unsweetened)

INSTRUCTIONS 

  1. Preheat oven to 350 degrees F
  2. Add all ingredients to a blender and blend until smooth.
  3. Pour the batter into a 9″ non-stick springform pan or baking dish with cooking spray. Smooth out the top.
  4. Bake for 25 minutes. Let cool and sprinkle powdered sugar on top. Cut into brownies or slice like a cake! Enjoy 🙂

Sassy me,

Michelle

Vegan Pesto

  
I. Love. Pesto. It’s such a great condiment for food. If you saw my recent post, I put some on my huge kale salad. Mm, mm! Just so delicious. But it’s so great to pair it with other foods like your favorite protein, pastas, burgers, toast, you name it! Since today is National Grilled Cheese Day, I think it would go great with some provolone and mozzarella cheese! Really good naturally leavened sourdough bread and some tomato slices. OMG! Why don’t I have those ingredients at home?? This is a continuous problem I have here. I always look at recipes and food blogs after I’ve already gone grocery shopping and get tempted to make a bunch of yummy food but can’t because I don’t want to make another trip to the store. The struggle is real. BUT I’ll be sure to get some of those ingredients next time and make it for you guys 😆 Ok, back to pesto…I of course didn’t have Parmesan cheese at home so I made a vegan pesto instead. You can definitely add nutritional yeast in to give it a cheesy and nutty taste if you’d like but if not, follow this recipe below! 

INGREDIENTS 

  • 3 cloves garlic 
  • 2 cups fresh basil leaves, loosely packed 
  • 1/2 cup extra virgin olive oil
  • 1/3 cup sunflower seeds 
  • 1/4 tsp salt
  • 1/4 tsp black pepper 
  • 1/4 tsp balsamic vinegar 
  • 1/3 cup nutritional yeast (optional) 

INSTRUCTIONS 

  1. In a food processor, mince the garlic. Add basil, sunflower seeds, salt, and pepper. Pulse until all has been chopped, not mushy. 
  2. Slowly add the olive oil while the food processor is on followed by the balsamic vinegar. Taste and add more salt/pepper if you need. Enjoy! 

Sassy me,

Michelle 

Eggy Goodness Perfect for Sunday Brunch

  
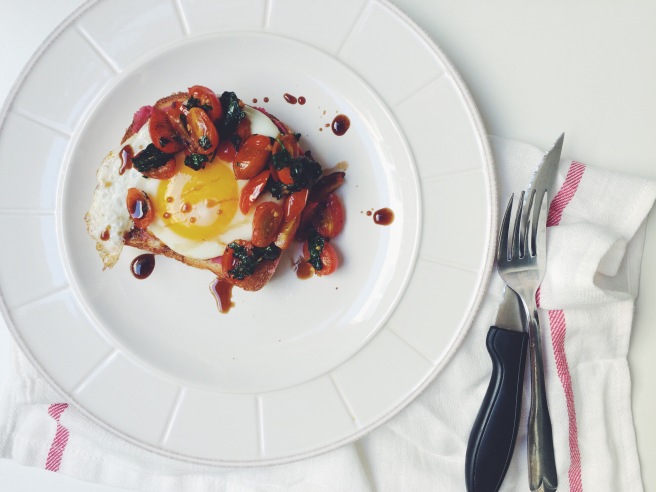
Wow! You know when you make something hoping it would turn out but in the process of it all, you don’t really know what you’re doing but just hoping for the best? Well, that was me this morning and all I can say is that I’m glad I experimented on this delicious eggy goodness. The flavors work so well together. You got the garlic from the hummus and the crunch of the bread to the runny yolk mixed in with the sautéed tomatoes…mm!! Perfecto! (Imagine me kissing my finger tips like the Italians do)

A girlfriend of mine posted a video of Bobby Flay’s Poached-Egg Brunch Sandwich to my Facebook and ever since I’ve been dying to try it. Of course I forgot to buy some of the ingredients yesterday when I went grocery shopping so I did the best I could today to re-create his masterpiece. While using his recipe as a guide, I came to realize that it’s totally different from his but the tomatoes and egg are sort of the same. I just didn’t want to use so much olive oil to poach 1 egg. But I’ll definitely follow his recipe down to the T when I have my friends visit for brunch because it looks bomb! Here’s the link for you lovelies to try: 

(video) https://m.facebook.com/story.php?story_fbid=10153323224091727&id=20534666726&refsrc=https%3A%2F%2Fm.facebook.com%2FFoodNetwork%2Fvideos%2F10153323224091727%2F

(step-by-step recipe) http://m.cookingchanneltv.com/recipes/bobby-flay/olive-oil-poached-eggs-on-toasted-sourdough-with-crisp-pancetta-and-tomato-mustard-seed-relish.html

So let’s cut to the chase and start making this yummy breakfast! 

INGREDIENTS 

  • Sourdough bread (loaf), cut 1/2 inch slice and toast to your liking (I got mine fresh from Wholefoods)
  • 1 large egg
  • Handful of cherry tomatoes, cut in quarters 
  • Handful of fresh parsley, roughly chopped 
  • 1 tsp coconut oil
  • Salt/pepper to taste 
  • Red pepper flakes to taste 
  • 1-2 Tbsp Beet Hummus (search this in my blog. It’s the one before this post!) 
  • 1 Tbsp Balsamic glaze, drizzle over the top**

INSTRUCTIONS

  1. Toast your bread to your liking.
  2. Add coconut oil, tomatoes, salt, pepper, red pepper flakes to a skillet on medium heat. Sauté for a couple minutes. Throw in the parsley and cook for another minute or two. Stirring throughout. Set aside.
  3. Using the same skillet (without washing), break the egg and cover until the white part of the egg has cooked, leaving a runny yolk. Medium heat.
  4. Now the layering process…spread 1-2 Tbsp of beet hummus on the toast, layer the egg, top with tomato mixture. Drizzle balsamic glaze over the top. Let the runny yolk spill over and clean your plate with your toast. Enjoy! 
  5. **Balsamic Glaze recipe: 1 cup balsamic vinegar & 1/2 cup honey. Combine both ingredients to a saucepan and bring to a boil. Reduce heat and simmer until the glaze reduces by half and is thick. Small bubbles will form to the surface. Heat for about 20 minutes. Let cool to room temp and keep in an airtight container in the fridge and use it whenever! 

Did you know…

When tomatoes are cooked, more of the antioxidant lycopene is released. This antioxidant can help fight cell damage and lower your risk of heart disease, cancer and macular degeneration. Tomatoes are also a good source of vitamin C which plays a vital role in collagen formation. 

Sassy me,

Michelle 

Beet Hummus

  
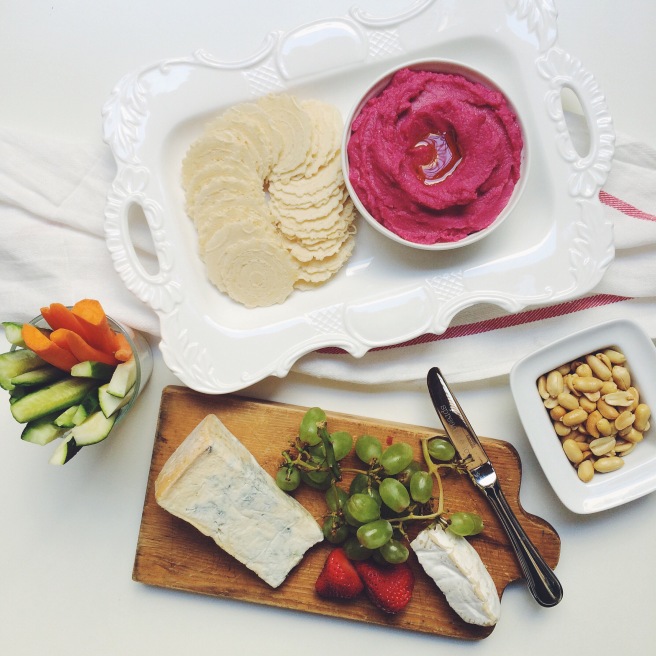
I love the color of this spread. And by spread, I’m not talking about the cheese platter. Although, I do really enjoy how colorful it is. But the hummus…it’s just so vibrant and beautiful! 😆 I was inspired to make this recipe from Lindsay (@thetoastedpinenut on Instagram) and have wanted to make it for the past month or so but finally got around to doing it. The perfect opportunity to do so was when I visited my sister and brother-in-law and got to pull the beet root straight out of their garden! It’s always so fun to see what they have growing in their backyard. In addition to the beet root, they gave me red lettuce and dill. Best of all, it’s organic! As much as I tried to duplicate Lindsay’s recipe, I just didn’t have all of the ingredients at home and didn’t want to leave to buy such little ingredients so I used what I had and made it work! Check out the recipe below for some yummy purpley goodness! 

INGREDIENTS

  • 1 can 15 oz. chickpeas, rinsed & drained (save 2 tbsp of liquids) 
  • 1 purple beet 
  • 3 cloves garlic 
  • Salt/pepper to taste 
  • Extra virgin olive oil to top off right before serving 

INSTRUCTIONS 

  1. Rinse and peel the beet. Boil water in a pot and cook beet until fork tender. About 25-30 minutes 
  2. Roughly chop beets. Blend in a food processor or blender for 30 seconds until chunky 
  3. Add the rest of the ingredients to the beets including the 2 tbsp of chickpea liquids. Scrape the sides of the blender in between blends. Continue until smooth. 
  4. Serve with veggie sticks or spread it on toast. Enjoy! 

*Use organic if possible 

Sassy me,

Michelle 

Banana Oat Muffins with Greek Yogurt & Chocolate Frosting

  
I found this recipe for these not-so-sweet banana muffins via the Running With Spoons blog (runningwithspoons.com) and I think they’re great for a light breakfast. I topped some of them off with chocolate frosting made by @nourishingfir from Instagram and thought it paired perfectly. Thank you to these inspiring women for your wonderful recipes that I can enjoy from the comfort of my own home 🙏🏼 

What’s great about these muffins is they’re gluten free, butter free and oil free*. It’s light enough for breakfast or a light snack. The boyfriend liked them since he’s not really into sweets and thought they were moist enough. This recipe makes about 10-11 muffins and the total time takes around 45 minutes. Check out the recipe below! 

For Banana Oat Muffins:

INGREDIENTS 

  • 1 cup plain Greek yogurt (I used Siggi’s plain yogurt)
  • 2 medium ripe bananas (or 1 cup mashed)
  • 2 large eggs
  • 2 cups GF rolled oats (old fashioned or quick), process in blender until it turns into a powder
  • 1/4 cup brown sugar
  • 1 1/2 tsp baking powder
  • 1/2 tsp baking soda
  • *Spray oil to coat the cupcake pan or if using cupcake liners, spray a little in there as well. It will prevent the paper from sticking to your muffin!

INSTRUCTIONS

  1. Preheat oven to 400F and prepare a cupcake pan by spraying the cavities with cooking spray or lining them with paper liners. Set aside.
  2. Add all the ingredients to a blender or food processor and process on high until the oats are broken down and batter is smooth and creamy. Optional: fold in chocolate chips or walnuts
  3. Pour batter into prepared cupcake pan, filling each cavity until it is about 3/4 full.
  4. Bake for 15-20 minutes, until the tops of your muffins are set and a fork or toothpick inserted into the middle comes out clean. Allow muffins to cool in pan for ~10 minutes before removing. Store in an air-tight container for up to a week.

For Chocolate Frosting-

INGREDIENTS 

  • 1 ripe avocado 
  • 1/4 cup honey 
  • 1/2 cup cacao powder 
  • 1-2 Tbsp water (it may be a bit thick. Water will help. 

INSTRUCTIONS

  1. Combine all ingredients into a blender until smooth and creamy. You may have leftovers! Add to banana and toast for a sweet treat! 
  2. Top it off with more Greek yogurt, banana slices, and unsweetened coconut shavings. Enjoy!

Sassy me,

Michelle 

Pearl Couscous Salad with Chicken & Lemon Balsamic Vinaigrette 

  
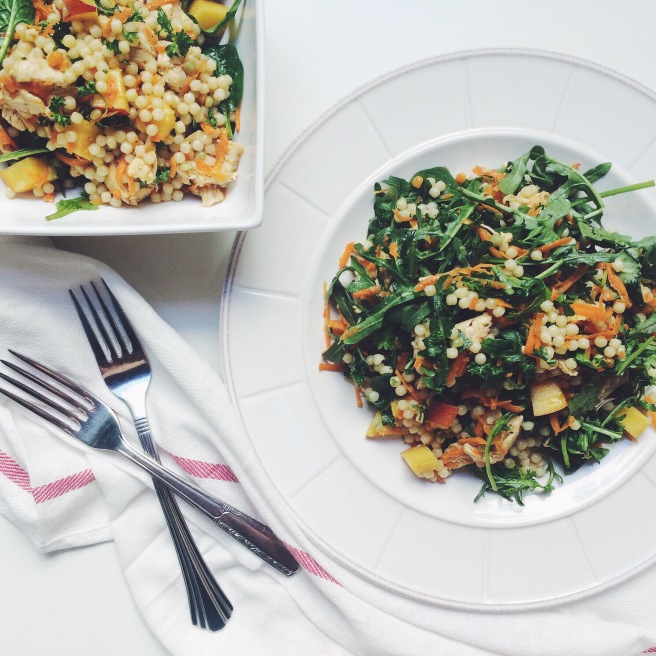
This salad is just perfect for the warmer days we’ve been getting in Southern California and one that needs to be made for when summer really comes. I see this paired perfectly with food you’d make at a BBQ–burgers, hotdogs, and wings. It’s also a nice touch to any dinner party and makes for a light lunch, too. Whatever the occasion, it’s a delicious salad with great flavors and textures. Plus, it’s a balanced meal with chicken for your protein, couscous for your grain serving, and your fruit and veggie serving is complete with arugula, carrots and a sweet yet slightly tart nectarine. The dressing is super easy to make and can be made in a large batch for future use. Check out the recipe below and make your salad right meow! 😽 This serves 4-6. 

INGREDIENTS 

For the salad:

  • Lemon-herb chicken, 5 small chicken breasts chopped in bite sized pieces (see previous recipe for this)
  • 1 cup pearl couscous (cook according to package) 
  • 1/2 cup firm but ripe nectarine, chopped 
  • 3 cups arugula
  • 2 carrots, shredded
  • 1/2 cup fresh parsley, chopped 

For the dressing:

  • 1/8 cup olive oil
  • 2 Tbsp balsamic vinegar 
  • 1 Tbsp lemon juice 
  • 2 tsp honey
  • Generous amount of crushed black pepper 
  • Crushed sea salt to taste 

INSTRUCTIONS

  1. Once the couscous has cooled off, place in a large salad bowl and add the chicken, arugula, shredded carrots, chopped parsley, and chopped nectarines. Toss together.
  2. Pour the lemon-balsamic vinaigrette over the salad and gently fold. Serve warm or refrigerate for 30-60 minutes or until cool. Serve immediately. Enjoy!

Sassy me,

Michelle 

Lemon-Herb Chicken

  
 This is such a great recipe and something I make often because it’s easy to prep and easy to pack. I like to make a big batch at the beginning of the week to get my protein prep out of the way. Just dress the chicken and pop it in the oven and it’s done in minutes. To prevent boredom and eating the same thing everyday, you can eat the chicken with different sides (salads, quinoa, brown rice, sweet potatoes, etc) because it goes well with anything. Check out the step-by-step recipe below and get meal prepping today! 

INGREDIENTS

  • Boneless, skinless chicken breast (choose how many you’d like to make for the week. 8-10 pieces is a good start) 
  • 2-3 Tbsp olive oil
  • 1/2 tsp dried rosemary
  • 1/4 tsp dried basil
  • 1/4 tsp dried parsley
  • Drizzle a little honey just over the top
  • Sea salt/cracked black pepper to taste 
  • Juice of 1/2 lemon 

INSTRUCTIONS

  1. Preheat oven to 425 degrees F
  2. Poke holes in chicken breasts with a steak knife to allow the chicken to absorb the juices and seasonings
  3. On a baking sheet or large baking pan (13 x 9) lay down the chicken, leaving little room in between each
  4. Add olive oil and rub all over chicken using your hands (wear gloves to avoid mess) 
  5. Add herbs, honey and lemon juice 
  6. Bake for 18-20 minutes. Check at the 15 minute mark to gauge if it’ll need the full 20 minutes. If your chicken is thicker it may need more time to cook. Cut in half to check for doneness. It should be tender and juicy! Enjoy! 

Sassy me,

Michelle